Blog - Crusader Beats - Page 2

Studio Monitoring: Monitors vs Headphones – What Should You Use?

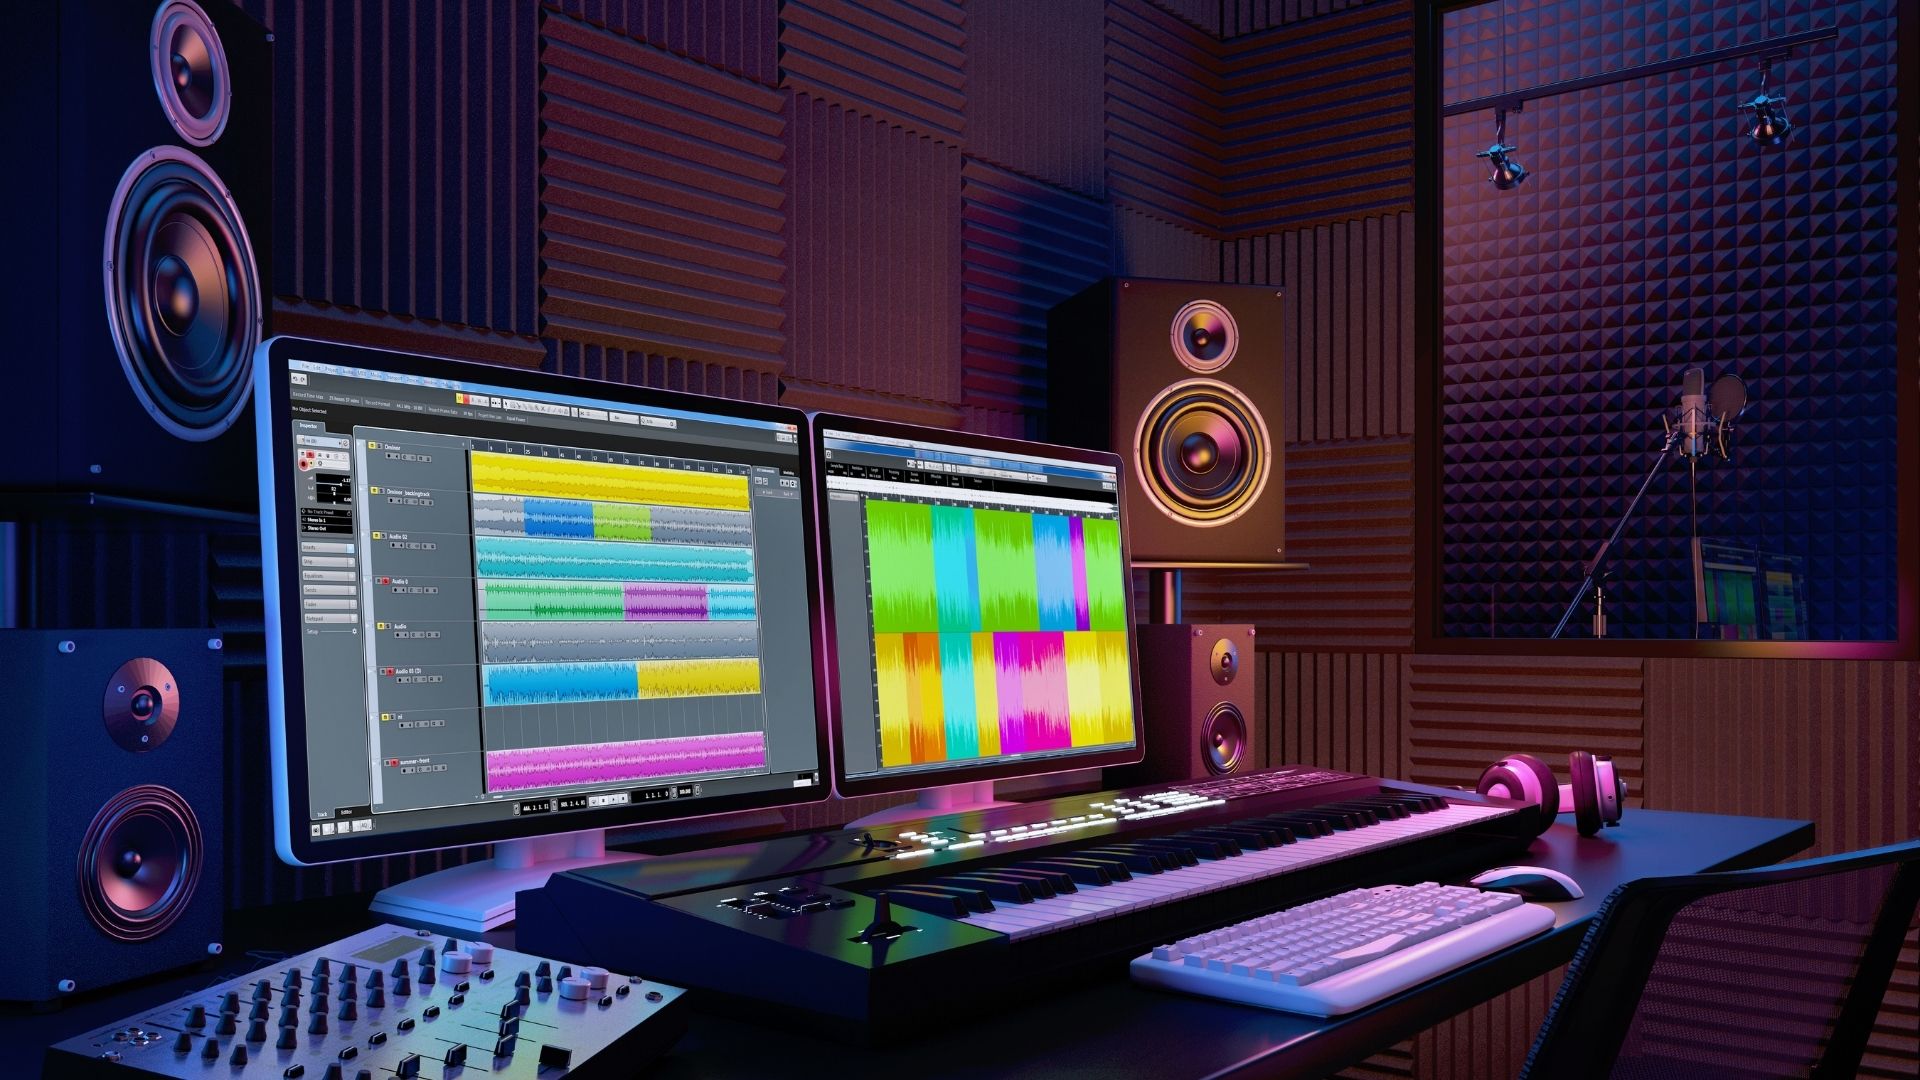
Accurate monitoring is one of the most important elements of music production. No matter how good your skills are, poor monitoring can lead to mixes that don’t translate well to other systems. One of the most common questions producers ask is whether it’s better to mix on studio monitors or headphones.

In this article, we’ll compare both options and explain how to choose the right monitoring setup for your workflow.


What Is Studio Monitoring?

Studio monitoring refers to how you listen to and evaluate your audio during recording, mixing, and mastering. The goal is not to make music sound “good,” but to hear it accurately and honestly.

Good monitoring helps you:

  • Make better mix decisions
  • Hear problems clearly
  • Create mixes that translate across systems

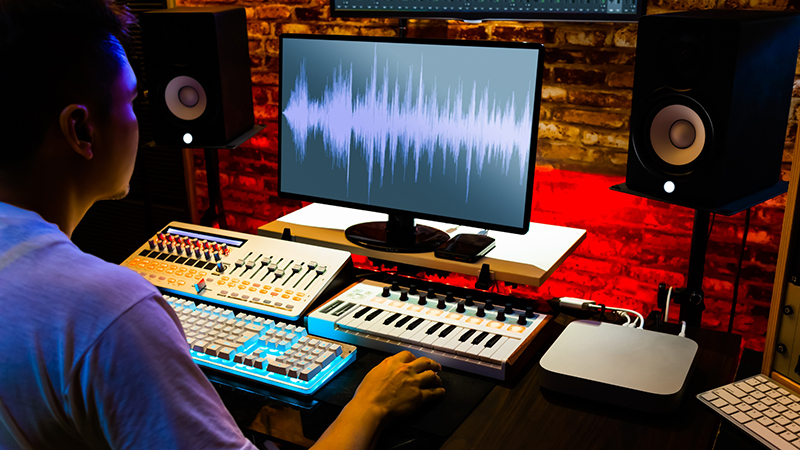
Studio Monitors – Strengths and Weaknesses

Advantages of Studio Monitors

Studio monitors are designed to produce a flat and neutral frequency response.

Key benefits:

  • Natural stereo imaging
  • Realistic low-end perception
  • Physical sense of space and depth
  • Better balance decisions

Monitors allow you to hear how sound behaves in a real room, similar to how listeners experience music.


Disadvantages of Studio Monitors

Despite their benefits, monitors have limitations:

  • Strongly affected by room acoustics
  • Require acoustic treatment for best results
  • Not ideal for small or untreated rooms
  • Can be impractical in apartments or shared spaces

Without proper room treatment, monitors may sound misleading.


Headphones – Strengths and Weaknesses

Advantages of Headphones

Headphones provide a controlled listening environment, independent of the room.

Key benefits:

  • No room acoustics issues
  • Excellent detail and clarity
  • Ideal for late-night work
  • Affordable and portable

They are especially useful for:

  • Editing
  • Noise detection
  • Fine EQ adjustments

Disadvantages of Headphones

However, headphones also have drawbacks:

  • Unrealistic stereo width
  • Fatigue during long sessions
  • Difficult low-end judgment
  • Sound occurs “inside the head” rather than in space

Mixes done only on headphones may not translate well to speakers.


Open-Back vs Closed-Back Headphones

  • Open-back headphones offer a more natural sound and wider image
  • Closed-back headphones provide isolation and are better for recording

For mixing, open-back models are usually preferred.


Which Is Better for Mixing?

The truth is: neither is perfect on its own.

Best practice:

  • Use studio monitors for balance and spatial decisions
  • Use headphones for detail and precision

Many professionals switch between both during a session.


Budget and Space Considerations

If you:

  • Have a treated room → monitors are a great investment
  • Work in a small or untreated room → headphones may be more reliable
  • Have limited budget → good headphones offer excellent value

Your environment matters as much as your gear.


Translation Is the Real Test

Regardless of your monitoring choice:

  • Check mixes on multiple systems
  • Use reference tracks
  • Listen on earbuds, car speakers, and consumer headphones

Good monitoring helps, but translation testing is essential.


Common Monitoring Mistakes

  • Mixing too loud
  • Relying on one listening system only
  • Ignoring room acoustics
  • Over-trusting expensive gear

Your ears and experience matter more than equipment price.


Choosing between studio monitors and headphones is not about right or wrong—it’s about understanding their strengths and limitations. The best results often come from using both together, even in a home studio setup.

Accurate monitoring leads to better mixes, better decisions, and better music.

Infinity EQ VST – Precision Equalization for Modern Mixing

Equalization is one of the most essential tools in audio production, and modern workflows demand EQ plugins that are both powerful and intuitive. Infinity EQ VST is designed to deliver high-quality sound shaping with a focus on clarity, precision, and flexibility, making it a valuable tool for mixing and sound design.

In this article, we’ll take a closer look at what Infinity EQ is, how it works, and where it fits in a modern production setup.


What Is Infinity EQ VST?

Infinity EQ is a software equalizer plugin (VST) that allows producers to control the frequency content of audio signals with great accuracy. It is designed for use in mixing, mastering, and sound design, offering both transparent corrective EQ and creative tone shaping.

As a VST plugin, Infinity EQ integrates seamlessly with most popular DAWs.


Clean and Transparent Sound

One of the key strengths of Infinity EQ is its clean and transparent sound character.

Key benefits:

  • Minimal coloration
  • High audio fidelity
  • Precise frequency control

This makes Infinity EQ especially useful for corrective EQ tasks, where accuracy is more important than character.


Flexible EQ Bands and Filters

Infinity EQ typically offers:

  • Multiple fully parametric bands
  • High-pass and low-pass filters
  • Adjustable Q (bandwidth)
  • Gain control for precise cuts and boosts

These tools allow engineers to solve frequency problems quickly and efficiently.


Visual Feedback and Workflow

A modern EQ must provide clear visual information, and Infinity EQ delivers:

  • Real-time frequency spectrum display
  • Easy band selection and adjustment
  • Intuitive interface for fast decision-making

Visual feedback helps identify problematic frequencies and speeds up the mixing process.


Corrective vs Creative EQ

Infinity EQ can be used in two main ways:

Corrective EQ

  • Removing resonances
  • Cleaning low-end rumble
  • Controlling harsh frequencies

Creative EQ

  • Enhancing presence and air
  • Shaping tone and character
  • Highlighting key elements in a mix

This versatility makes it suitable for both technical and artistic tasks.


Use Cases in Music Production

Infinity EQ works well on:

  • Vocals
  • Drums and percussion
  • Bass and synths
  • Guitars and keys
  • Mix buses and subgroups

Its transparent nature also makes it a solid choice for mastering.


Advantages of Using Infinity EQ VST

Pros:

  • Clean, precise sound
  • Easy-to-use interface
  • Suitable for mixing and mastering
  • Efficient workflow

Possible Limitations:

  • Less analog coloration compared to vintage EQs
  • Focused on precision rather than character

Many producers combine Infinity EQ with analog-style EQs for a balanced toolkit.


Infinity EQ in a Modern Plugin Chain

Infinity EQ works best:

  • Early in the signal chain for cleanup
  • Before compression for better dynamics control
  • On buses for subtle tonal shaping

Used thoughtfully, it helps create space and clarity in complex mixes.


Infinity EQ VST is a reliable and precise equalizer designed for modern production needs. Its transparent sound and intuitive workflow make it an excellent choice for producers who value accuracy and control.

Whether you’re cleaning up vocals, shaping synths, or fine-tuning a mix, Infinity EQ provides the tools needed to make confident EQ decisions.

How to Record Vocals at Home – A Practical Guide for Beginners

Recording vocals at home has never been more accessible. With affordable equipment and modern DAWs, it’s possible to achieve professional-sounding vocal recordings without a studio. However, great results depend more on technique and preparation than expensive gear.

This guide explains how to record vocals at home properly, step by step.


Choose the Right Recording Space

The room matters more than the microphone.

Tips for choosing a space:

  • Avoid large, empty rooms
  • Use rooms with soft furnishings
  • Stay away from windows and noisy areas

Simple acoustic treatment:

  • Hang thick blankets or duvets
  • Use curtains, rugs, and bookshelves
  • Record in a closet with clothes if possible

The goal is to reduce reflections and background noise.


Essential Equipment for Home Vocal Recording

You don’t need a professional studio, but a few basics are required.

Minimum setup:

  • Microphone (condenser or dynamic)
  • Audio interface
  • Pop filter
  • Closed-back headphones
  • DAW (Digital Audio Workstation)

A reliable interface and clean mic signal are more important than high-end gear.


Microphone Choice and Placement

Condenser vs Dynamic:

  • Condenser mics capture detail and brightness
  • Dynamic mics handle untreated rooms better

Mic placement tips:

  • Keep the mic 15–20 cm (6–8 inches) from the mouth
  • Use a pop filter to reduce plosives
  • Slightly angle the mic to soften harsh consonants

Consistent positioning ensures consistent tone.


Set Proper Recording Levels

Good gain staging prevents distortion and noise.

Best practices:

  • Aim for peaks around -10 to -6 dBFS
  • Avoid clipping at all costs
  • Record quieter rather than too loud

You can always increase volume later.


Create a Comfortable Vocal Performance

A great performance matters more than technical perfection.

Tips for better takes:

  • Warm up before recording
  • Stay hydrated
  • Use comfortable headphone levels
  • Turn off distractions

Confidence and comfort directly affect vocal quality.


Reduce Background Noise

Before hitting record:

  • Turn off fans, AC, and electronics
  • Silence phones and notifications
  • Record during quiet hours

Always record a few seconds of room tone—it helps with noise reduction later.


Use Proper Monitoring

  • Use closed-back headphones to prevent bleed
  • Adjust latency settings in your DAW
  • Avoid loud headphone levels

Low-latency monitoring helps singers stay in time and in tune.


Record Multiple Takes and Comp Vocals

Professional vocals are rarely one perfect take.

Best approach:

  • Record several full takes
  • Capture extra takes for tricky sections
  • Comp the best parts into one final performance

This gives you flexibility and better results.


Basic Vocal Processing (After Recording)

Keep processing simple at first.

Typical vocal chain:

  • High-pass filter to remove low rumble
  • Light compression to control dynamics
  • De-esser for harsh “S” sounds
  • Subtle EQ for clarity

Less processing often sounds more natural.


Common Home Recording Mistakes

Avoid these pitfalls:

  • Recording in an untreated room
  • Setting levels too hot
  • Standing too far or too close to the mic
  • Over-processing vocals

Focus on clean recording first—mixing comes later.


Recording vocals at home is about control, preparation, and performance. With a quiet space, proper mic technique, and careful gain staging, you can achieve impressive results even in a simple home setup.

Great vocals start before you press record.

New Chill LoFi Type Beat – What Remains

“What Remains” is a chill LoFi hip-hop piano type beat with smooth melodies, soft drums, and a relaxed, reflective atmosphere. Perfect for melodic rap, freestyles, storytelling, or background music for creative projects. Its calming and emotional vibe makes it ideal for late-night sessions, study, or simply chilling out.

Sound Layering – How to Do It Properly

Sound layering is one of the most powerful techniques in modern music production. When done correctly, layering can make sounds fuller, wider, and more professional. When done poorly, it can lead to muddy mixes, phase issues, and lack of clarity. Understanding how to layer sounds properly is essential for any producer.

In this article, we’ll explain what sound layering is, why it matters, and how to use it effectively.


What Is Sound Layering?

Sound layering is the process of combining multiple sounds to create a single, richer result. Instead of relying on one instrument or sample, producers stack complementary sounds that work together as one.

Commonly layered elements include:

  • Synth leads

  • Bass sounds

  • Drum hits

  • Vocals

  • Pads and textures


Why Layering Is Important

Layering allows you to:

  • Add depth and power to sounds

  • Combine different sonic characteristics

  • Fill the frequency spectrum more effectively

  • Create unique, custom tones

Many professional sounds are actually made from several layers working together.


Start with a Clear Purpose

Before adding layers, ask yourself:

  • What is missing from the sound?

  • More low-end?

  • More attack?

  • More width or texture?

Every layer should have a specific role. Avoid layering just for the sake of it.


Frequency Separation Is Key

One of the most important rules of layering is frequency management.

Best Practices:

  • Use EQ to remove unnecessary frequencies

  • Let each layer dominate a specific frequency range

  • Avoid multiple layers competing in the same space

For example:

  • One layer for low-end

  • One for mid-range body

  • One for high-end detail


Timing and Phase Alignment

Layered sounds must work together in time and phase.

Tips:

  • Align transients, especially for drums

  • Check for phase cancellation

  • Use small delays or phase tools if needed

Poor phase alignment can make layered sounds weaker instead of stronger.


Layering Drums Effectively

Drum layering is extremely common, especially for:

  • Kicks

  • Snares

  • Claps

Example:

  • Kick layer 1: sub and low-end

  • Kick layer 2: punch and mid-range

  • Kick layer 3: click or attack

Balance the layers carefully and treat them as one sound.


Layering Synths and Instruments

When layering synths:

  • Use different waveforms or synthesis types

  • Detune slightly for width

  • Pan layers subtly left and right

This creates a wider, more interesting stereo image.


Use Volume Before Processing

Always balance levels before adding effects.

  • Lower volumes reduce clutter

  • Small changes make a big difference

  • Loud layers are not always better layers

Proper gain staging is essential for clean layering.


Group and Process Layers Together

Once layered:

  • Route layers to a bus or group

  • Apply compression or saturation to glue them together

  • Treat them as a single instrument

This helps the layers feel cohesive.


Avoid Over-Layering

More layers do not automatically mean better sound.

Common mistakes:

  • Too many layers doing the same job

  • Unnecessary frequency buildup

  • Overcomplicated arrangements

Sometimes one well-chosen sound is better than five average ones.


Layering in Different Genres

  • EDM: aggressive multi-layer leads and basses

  • Hip-hop: layered drums and 808 textures

  • Pop: subtle layering for polish

  • Cinematic: wide, evolving layers for depth

Adjust your approach based on genre and style.


Sound layering is about intention, balance, and clarity. When each layer has a purpose and space in the mix, the result is powerful and professional. Mastering layering takes practice, but it’s one of the most valuable skills a producer can develop.

How to Build an Arrangement in Different Music Genres

Arrangement is one of the most important—and often most challenging—parts of music production. Even with great sounds and a strong idea, a track can feel flat or unfinished if the arrangement isn’t working. Understanding how arrangements differ across genres helps producers structure tracks more effectively and keep listeners engaged.

In this article, we’ll explore how to build arrangements in various music styles and what each genre typically requires.


What Is Musical Arrangement?

Arrangement refers to how a song is structured over time:

  • When elements enter and exit

  • How energy rises and falls

  • How sections connect and evolve

A good arrangement tells a story, guiding the listener through the track from beginning to end.


Common Arrangement Building Blocks

Most genres use some combination of these sections:

  • Intro

  • Verse

  • Pre-Chorus

  • Chorus / Drop

  • Bridge / Breakdown

  • Outro

How long these sections last—and how they function—depends heavily on the genre.


Electronic Dance Music (EDM)

EDM arrangements are designed for energy control and impact.

Typical Structure:

  • Intro (DJ-friendly, minimal)

  • Build-up

  • Drop

  • Breakdown

  • Second build-up and drop

  • Outro

Key Tips:

  • Use automation to build tension

  • Remove elements before drops for impact

  • Repeat ideas with variation to maintain interest


Hip-Hop

Hip-hop arrangements focus on lyrics, groove, and repetition.

Typical Structure:

  • Intro

  • Verse

  • Hook (Chorus)

  • Verse

  • Hook

  • Outro

Key Tips:

  • Keep beats consistent to support vocals

  • Introduce subtle variations between verses

  • Drop elements during verses to highlight lyrics


Pop Music

Pop music emphasizes clarity, memorability, and structure.

Typical Structure:

  • Intro

  • Verse

  • Pre-Chorus

  • Chorus

  • Verse

  • Chorus

  • Bridge

  • Final Chorus

Key Tips:

  • Make the chorus the emotional peak

  • Keep transitions smooth and predictable

  • Avoid overcrowding the mix


Rock and Alternative

Rock arrangements are often performance-driven.

Typical Structure:

  • Intro

  • Verse

  • Chorus

  • Verse

  • Chorus

  • Bridge

  • Final Chorus

Key Tips:

  • Use dynamics (quiet vs loud sections)

  • Build intensity with guitars and drums

  • Let instruments breathe between sections


Techno and House

These genres rely on gradual evolution rather than dramatic changes.

Typical Structure:

  • Long intro

  • Groove development

  • Breakdown

  • Peak section

  • Outro

Key Tips:

  • Introduce elements one at a time

  • Focus on texture and rhythm changes

  • Keep transitions smooth for DJ mixing


Drum & Bass and Jungle

Fast-paced genres need tight energy management.

Typical Structure:

  • Intro (atmospheric)

  • Drop

  • Mid-section variation

  • Second drop

  • Outro

Key Tips:

  • Keep drums driving and consistent

  • Use breakdowns to reset energy

  • Vary bass patterns to maintain excitement


Cinematic and Ambient Music

These styles focus on mood and progression, not traditional song forms.

Typical Structure:

  • Slow intro

  • Gradual build

  • Emotional peak

  • Resolution

Key Tips:

  • Develop themes slowly

  • Use layering and automation

  • Avoid abrupt changes


Arrangement Techniques That Work in Any Genre

Regardless of style:

  • Remove elements to create contrast

  • Use automation to add movement

  • Change patterns slightly when sections repeat

  • Think in terms of energy, not just sections


Common Arrangement Mistakes

  • Adding too many elements too early

  • Repeating sections without variation

  • Ignoring transitions between parts

  • Overcomplicating the structure

Simplicity often leads to stronger arrangements.


Building arrangements in different genres requires understanding their structure, energy flow, and audience expectations. While rules vary, the goal is always the same: guide the listener through an engaging musical journey.

Learning genre-specific arrangement techniques—and knowing when to break the rules—will greatly improve your productions.

Serum VSTi – The Modern Standard for Wavetable Synthesis

When it comes to contemporary software synthesizers, Xfer Records Serum has earned a reputation as one of the most powerful and widely used VST instruments in modern music production. Known for its pristine sound quality, intuitive interface, and deep wavetable capabilities, Serum has become a go-to synth for producers across countless genres.

In this article, we’ll explore what Serum is, how it works, and why it remains so popular.


What Is Serum VSTi?

Serum is a wavetable synthesizer VSTi developed by Xfer Records. Unlike traditional subtractive synths, Serum allows users to dynamically scan through waveforms, creating rich, evolving sounds with incredible clarity.

It’s available as VST, AU, and AAX, making it compatible with most modern DAWs.


High-Quality Sound Engine

One of Serum’s biggest strengths is its ultra-clean sound engine.

Key characteristics:

  • High-resolution wavetable processing

  • Minimal aliasing, even at extreme settings

  • Transparent, digital sound character

This makes Serum especially suitable for modern electronic music styles that demand clarity and precision.


Wavetable Synthesis Explained

Serum uses wavetable synthesis, where a sound is created by moving through a series of single-cycle waveforms.

Why Wavetables Matter

  • Smooth tonal movement

  • Complex harmonic evolution

  • Highly expressive sound design

Serum allows users to:

  • Import custom wavetables

  • Edit and morph waveforms

  • Create entirely new tables from audio


User-Friendly Interface

Despite its depth, Serum is known for its visual and intuitive interface.

Notable features:

  • Drag-and-drop modulation

  • Real-time waveform visualization

  • Clear signal flow

  • Easy-to-learn layout

This makes Serum approachable for beginners while remaining powerful for advanced users.


Modulation and Sound Design

Serum offers extensive modulation options:

  • Multiple LFOs and envelopes

  • Assign modulation by dragging sources to parameters

  • Complex movement with minimal effort

The modulation system encourages experimentation and fast sound creation.


Built-In Effects Rack

Serum includes a comprehensive effects section:

  • Distortion and saturation

  • Chorus, phaser, and flanger

  • Reverb and delay

  • Multiband compression (OTT-style)

All effects are integrated into a single rack, allowing complex processing chains within one plugin.


Genre Versatility

Serum is widely used across genres:

  • EDM and future bass

  • Dubstep and bass music

  • Pop and hip-hop

  • Film and game sound design

  • Experimental electronic music

Its ability to create aggressive, clean, and evolving sounds makes it extremely flexible.


Pros and Cons

Pros:

  • Exceptional sound quality

  • Intuitive modulation workflow

  • Deep wavetable editing

  • Large preset ecosystem

Cons:

  • CPU-intensive at high settings

  • Less analog warmth compared to vintage-style synths

  • Requires learning synthesis basics for best results


Serum vs Other Synths

Compared to synths like Massive, Vital, or Sylenth1:

  • Serum focuses on clarity and precision

  • Offers deeper wavetable control than most competitors

  • Less “analog” character out of the box

Many producers pair Serum with analog-modeled synths for balance.


Serum VSTi has become a modern classic for a reason. Its combination of clean sound, deep synthesis, and intuitive design makes it one of the most powerful tools available to electronic music producers.

Whether you’re designing aggressive basses, lush pads, or cutting-edge leads, Serum provides the flexibility and quality to bring your ideas to life.

FL Studio Mobile 4.9 – What’s New in the Latest Updates (4.9.0 & 4.9.1)

The FL Studio Mobile 4.9 update series marks an important step forward for mobile music production. With version 4.9.0, released on December 3, 2025, Image-Line introduced powerful creative tools and major workflow improvements. Just a few days later, version 4.9.1 (December 9, 2025) followed up with essential bug fixes that improve stability and reliability.

Let’s take a complete look at what’s new in FL Studio Mobile 4.9.


New Note Effects – Expanded Creative Possibilities (4.9.0)

One of the standout features of version 4.9.0 is the addition of new Note Effects, bringing more generative and musical tools to the Piano Roll.

New Note Effects

  • Echo – Adds rhythmic repeats directly to notes

  • Transpose – Automatically shifts pitches

  • Randomizer – Introduces controlled randomness

  • Scale – Locks notes to a selected musical scale

These effects are perfect for fast idea generation, creative experimentation, and modern electronic workflows.


Save Projects as .FLP for Desktop Use (4.9.0)

FL Studio Mobile now allows projects to be saved as .FLP files, making them compatible with FL Studio Desktop.

Why This Is a Game-Changer

  • Start projects on mobile, finish on desktop

  • Seamless workflow between devices

  • Ideal for producers working on the go

This feature significantly elevates FL Studio Mobile as a serious production environment.


New Factory Templates (4.9.0)

To speed up the creative process, new factory templates have been added.

Benefits include:

  • Faster project setup

  • Better starting points for different genres

  • Improved experience for beginners


Fine-Tune Mode for Greater Precision (4.9.0)

All continuous controls now feature a Fine-Tune mode, allowing:

  • More precise parameter adjustments

  • Better automation control

  • Improved accuracy on touch screens

This small but important addition greatly improves detailed sound design and mixing.


Workflow and Editing Improvements (4.9.0)

Several quality-of-life improvements make editing smoother and faster:

  • Editors auto-scroll when dragging notes or clips toward screen edges

  • Rotate Left / Right options added to the Drums sequencer

  • Drumset Picker now opens on the most recently used preset

These changes reduce friction and speed up arrangement work.


Improved File Management (4.9.0)

The file browser now supports Unzip, allowing users to:

  • Import zipped sample packs

  • Manage files more efficiently

  • Organize sound libraries directly inside the app


More Natural MIDI Performance (4.9.0)

The Piano Roll Humanize function has been refined:

  • Velocities are adjusted around existing values

  • Original musical intent is preserved

  • Results sound more natural and expressive

This is especially useful for drums, piano parts, and orchestral-style programming.


Bug Fixes and Stability Improvements (4.9.0)

  • Fixed an issue where Send levels reset when changing the Send destination


FL Studio Mobile 4.9.1 – Stability Update (December 9, 2025)

Shortly after the main release, Image-Line delivered FL Studio Mobile 4.9.1, focusing on critical bug fixes to improve reliability.

What’s New in 4.9.1

  • Fixed drums mixer preview not playing

  • Fixed project export crashing when tracks are minimized

These fixes are especially important for users working on larger projects or exporting tracks frequently.


Why the 4.9 Update Series Matters

Together, versions 4.9.0 and 4.9.1 show a clear direction for FL Studio Mobile:

  • Stronger integration with FL Studio Desktop

  • More creative and musical tools

  • Improved precision and editing workflow

  • Increased stability and reliability

FL Studio Mobile is no longer just a sketchpad—it’s becoming a true portable DAW.


FL Studio Mobile 4.9.0 (December 3, 2025) and 4.9.1 (December 9, 2025) form one of the most meaningful updates in the app’s history. From powerful new Note Effects and desktop compatibility to crucial stability fixes, this update series benefits both beginners and advanced producers.

If you make music on mobile—or want a flexible mobile-to-desktop workflow—FL Studio Mobile 4.9 is a must-have update.

Spectrasonics Stylus RMX – A Creative Rhythm Powerhouse

Rhythm is the backbone of music production. Whether you’re creating electronic music, film scores, pop tracks, or experimental soundscapes, strong rhythmic elements define the groove and energy of a track. One instrument that has shaped modern rhythm production for years is Spectrasonics Stylus RMX.

In this article, we’ll explore what Stylus RMX is, how it works, and why it remains a valuable tool for producers and composers.


What Is Spectrasonics Stylus RMX?

Stylus RMX is an advanced groove-based virtual instrument developed by Spectrasonics. It is designed for creating beats, percussion patterns, and rhythmic textures using high-quality audio loops rather than traditional MIDI drum programming.

Powered by the SAGE (Spectrasonics Advanced Groove Engine), Stylus RMX allows deep manipulation of audio loops while staying perfectly synced to your DAW.


The Sound Library

Stylus RMX comes with an extensive library of professionally recorded grooves and percussion sounds.

Included Sound Categories

  • Acoustic drum loops

  • Electronic beats

  • Hybrid and processed percussion

  • Rhythmic sound design elements

  • Cinematic and experimental grooves

The sounds are mix-ready and designed to fit seamlessly into modern productions.


The SAGE Engine – Advanced Groove Control

At the core of Stylus RMX is the powerful SAGE engine, which offers far more than simple loop playback.

Key Features

  • Automatic tempo synchronization

  • Slice-based loop manipulation

  • Real-time groove editing

  • Multi-output routing

  • MIDI drag-and-drop export

This makes it easy to reshape rhythms without losing audio quality.


Creative Editing and Modulation

Stylus RMX shines when it comes to creative rhythm design.

Built-in tools include:

  • Filters and effects per element

  • Envelopes and LFO modulation

  • Groove randomization

  • Chaos Designer, which generates evolving rhythmic variations

These features turn Stylus RMX into a true rhythmic sound design instrument.


DAW Integration and Workflow

Stylus RMX integrates smoothly with most major DAWs:

  • Full tempo and transport sync

  • Multiple instances per project

  • Stable performance in large sessions

  • Flexible routing options

It’s a popular choice for producers who want fast inspiration without sacrificing control.


Best Use Cases

Stylus RMX is widely used in:

  • Electronic and dance music

  • Film and TV scoring

  • Game soundtracks

  • Hip-hop and R&B

  • Experimental and hybrid productions

It’s especially valued for quickly generating inspiring rhythmic ideas.


Pros and Cons

Pros:

  • Massive, high-quality groove library

  • Deep audio loop manipulation

  • Powerful creative tools

  • Distinctive Spectrasonics sound

Cons:

  • Interface feels dated compared to modern plugins

  • Loop-based workflow may not suit everyone

  • Learning curve for advanced features


Stylus RMX in a Modern Production Environment

Despite its age, Stylus RMX still stands out due to its unique approach to rhythm. Unlike many modern drum plugins focused on MIDI programming, Stylus RMX emphasizes audio groove manipulation, making it especially strong for cinematic and hybrid styles.

Many producers continue to use it alongside newer tools for its character and speed.


Spectrasonics Stylus RMX is a timeless rhythm instrument that remains relevant thanks to its deep groove engine, creative flexibility, and high-quality sound library. While it may not look modern, its capabilities are still impressive by today’s standards.

If you’re looking for a powerful, inspiration-driven tool for rhythmic production, Stylus RMX is well worth exploring.

Gain Staging – Why It’s So Important in Music Production

Gain staging is one of the most fundamental yet often overlooked concepts in music production and mixing. Many beginners focus on plugins, effects, and loudness while ignoring proper level management—only to end up with distorted, muddy, or unbalanced mixes.

In this article, we’ll explain what gain staging is, why it matters, and how to apply it correctly in your productions.


What Is Gain Staging?

Gain staging is the process of managing signal levels at every stage of the audio chain—from the source sound to the final output.

This includes:

  • Audio clips and MIDI instruments

  • Plugin input and output levels

  • Channel faders

  • Buses and groups

  • The master channel

The goal is to maintain clean, consistent levels without clipping or unnecessary noise.


Why Gain Staging Is So Important

Proper gain staging ensures that:

  • Your mix stays clean and distortion-free

  • Plugins work as intended

  • You have enough headroom

  • Your master doesn’t clip

  • Mixing and mastering become easier

Poor gain staging, on the other hand, leads to problems that are difficult to fix later.


Digital Clipping and Headroom

In digital audio, 0 dBFS is the absolute maximum. Any signal above this level will clip, causing harsh digital distortion.

That’s why leaving headroom is essential:

  • Aim for peaks around -6 dBFS on the master

  • Individual tracks often peak between -18 and -10 dBFS

Lower levels do not mean lower quality—modern digital systems have more than enough dynamic range.


Gain Staging vs. Volume Balancing

It’s important to understand the difference:

  • Gain staging controls signal levels before processing

  • Volume balancing sets how loud elements are relative to each other

Gain staging ensures your signal is healthy; balancing makes the mix musical.


How Gain Staging Affects Plugins

Many plugins—especially analog-modeled ones—are designed to work best at certain input levels (often around -18 dBFS).

If the signal is too hot:

  • Compressors overreact

  • Saturation becomes harsh

  • EQ boosts exaggerate problems

Correct gain staging allows plugins to behave more predictably and musically.


A Simple Gain Staging Workflow

  1. Start with clean source levels

  2. Adjust clip gain or instrument output

  3. Check plugin input and output levels

  4. Avoid red meters at every stage

  5. Leave headroom on buses and master

  6. Use faders for balance, not correction

This approach keeps your mix controlled from start to finish.


Gain Staging and Mixing Clarity

When levels are managed properly:

  • EQ decisions become clearer

  • Compression sounds more natural

  • Transients are preserved

  • The mix feels more open and dynamic

Good gain staging sets the foundation for every other mixing decision.


Common Gain Staging Mistakes

1. Recording or rendering tracks too hot
2. Using faders instead of clip gain
3. Ignoring plugin output levels
4. Mixing close to 0 dBFS
5. Trying to fix level issues in mastering

These mistakes compound quickly and reduce mix quality.


Gain Staging in Modern DAWs

Modern DAWs use 32-bit floating-point audio, which offers internal headroom—but this does not eliminate the need for gain staging.

Clipping may be avoided internally, but:

  • Plugins can still distort

  • The master output can still clip

  • Monitoring levels can mislead your ears

Good habits still matter.


Gain staging isn’t glamorous, but it’s essential. It’s the invisible framework that supports clean mixes, better plugin performance, and smoother mastering.

If you get gain staging right early, everything else in music production becomes easier.

Remember:
A great mix starts with proper levels.

Previous Next
Flag Counter